LaTeX gives you full control over how your figures appear in your document. One of the most common issues new users face is when an image appears too big, too small, or distorted.
And another problem is figuring out the right scaling method that keeps good quality.
This tutorial will solve all these problems and show every reliable way to resize figures in LaTeX.
Table of Contents
Basic scaling using scale option
The simplest way to resize a figure in LaTeX is by using the scale option with the \includegraphics command. This scales both width and height proportionally based on the factor you provide.
It is a quick solution when you just need to shrink or enlarge an image while keeping its aspect ratio perfect.
\includegraphics[scale=0.5]{image.png}
- scale
- The numeric value after
scale=determines how much the image will shrink or expand. For example,0.5means the image will be half of its original size, and2will double it.
\documentclass{article}
\usepackage{graphicx}
\begin{document}
 \includegraphics[scale=0.6]{example-image}
\end{document}
Setting both width and height together
Sometimes you may need to define both width and height at the same time to control the exact figure dimensions.
This is useful when the image must fit into a strict layout box, for example, a report template or column-based design.
However, if both are set without keepaspectratio, the image might get distorted, so it’s important to handle that carefully.
\includegraphics[width=8cm, height=5cm]{example-image-a}
\includegraphics[width=8cm, height=5cm, keepaspectratio]{example-image-b}
- width
- Specifies how wide the image will appear. You can use fixed units like
cm,in, or relative ones like\textwidth. - height
- Defines the vertical size of the image. When both width and height are set, the image will stretch or compress to fill the box.
- keepaspectratio
- Adding this option ensures that even when both width and height are provided, the image keeps its original proportions and avoids distortion.
\documentclass{article}
\usepackage{graphicx}
\begin{document}

% Custom width and height (may distort if aspect ratio changes)
\includegraphics[width=8cm, height=5cm]{example-image}

% Safe scaling using keepaspectratio
\includegraphics[width=8cm, height=5cm, keepaspectratio]{example-image}

\end{document}
Setting width or height
When you need a more precise size, use width or height options. These let you define exactly how wide or tall the image should be. It’s very useful when aligning images with text or columns in your document.
\includegraphics[width=\textwidth]{image.png}
- width
- Defines the total horizontal size of the image. You can use units like
cm,in, or relative units like\textwidthor\linewidth. - height
- Sets the vertical dimension of the image. Usually used with
keepaspectratioto avoid distortion. - keepaspectratio
- Ensures that resizing keeps the original proportions of the image so it doesn’t look stretched or squashed.
\documentclass{article}
\usepackage{graphicx}
\begin{document}

\includegraphics[width=0.7\textwidth, keepaspectratio]{example-image}

\end{document}
Scaling relative to text width
Sometimes, you want your figure to fit nicely with the document’s text layout. In that case, using \textwidth or \linewidth is the best way.
It ensures the image automatically adjusts with your page margins, making your layout consistent across sections.
\includegraphics[width=\textwidth]{example-image-a}
\includegraphics[width=\linewidth]{example-image-b}
- \textwidth
- Represents the full width of the main text block on the page. Using it makes the image match the column width in single-column layouts.
- \linewidth
- Used especially in multi-column or nested environments, where the text width may differ from the global
\textwidth.
\documentclass{article}
\usepackage{graphicx}
\begin{document}

\begin{figure}[h]
  \centering
  \includegraphics[width=\linewidth]{example-image}
  \caption{Figure scaled to match text width}
\end{figure}

\end{document}
Advanced scaling with resizebox command
When you need full control and want to resize content exactly to a given size, use the \resizebox command from the same package. It lets you scale not only images but any LaTeX content, like tables or equations, to fit within specific dimensions.
\resizebox{width}{height}{content}
- width
- Specifies how wide the final object should be. Can be absolute (e.g. 8cm) or relative (e.g. \textwidth).
- height
- If you write
!instead of a value, LaTeX will automatically keep the aspect ratio constant while adjusting width. - content
- The actual figure or content that will be resized. Usually you place
\includegraphics{...}inside here.
\documentclass{article}
\usepackage{graphicx}
\begin{document}

\resizebox{0.5\textwidth}{!}{\includegraphics{example-image}}

\end{document}
Using minipage for controlled figure size
In more complex layouts, such as side-by-side figures or two-column designs, combining minipage with \includegraphics gives great control.
You can specify how much of the line each image occupies and ensure consistent scaling in multi-column layouts.
\begin{minipage}{width}
  \includegraphics[width=\linewidth]{image.png}
\end{minipage}
- minipage
- Creates a small container with its own local width. Any image inside will scale relative to that mini area.
- \linewidth
- Inside a
minipage,\linewidthrefers to that specific width rather than the full page width.
\documentclass{article}
\usepackage{graphicx}
\begin{document}

\begin{figure}[h]
  \centering
  \begin{minipage}{0.45\textwidth}
    \includegraphics[width=\linewidth]{example-image-a}
  \end{minipage}
  \hfill
  \begin{minipage}{0.45\textwidth}
    \includegraphics[width=\linewidth]{example-image-b}
  \end{minipage}
  \caption{Two images side by side with consistent scaling}
\end{figure}

\end{document}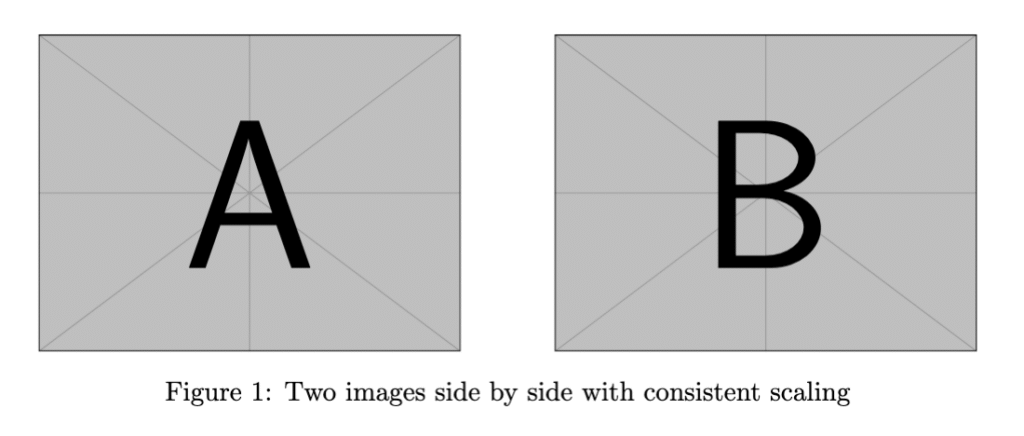
Best Practice
The most reliable and clean approach is to use \includegraphics[width=\textwidth]{...} or \linewidth within a figure environment.
It maintains proportions automatically and keeps your layout consistent. Use scale for quick adjustments, and \resizebox only when you need precise control.
Jidan
LaTeX enthusiast and physics educator who enjoys explaining mathematical typesetting and scientific writing in a simple way. Writes tutorials to help students and beginners understand LaTeX more easily.