One way of presenting ideas or items orderly is by making use of a list. LaTeX provides us with commands that help us to list our items with ease.
By default, there are 3 listing environments in LaTeX. They are
- itemize
\begin{itemize}text to be listed\end{itemize} - enumerate
\begin{enumerate}text to be listed\end{enumerate} - description
\begin{description}text to be listed\end{description}
In all the 3 environments, the listed text is indented from the left margin the label is included automatically.
The list environment gives a unique type of label by default unless customized. The \item command is responsible for producing the different labels.
Table of Contents
\item[option] command contains an optional argument that appears in boldface as the label.
Itemize list environment(Start with bullet points)
The itemize environment is used to produce an unnumbered list. Default marking or label of an item in the itemize environment is a bullet.
\documentclass{article}
\begin{document}
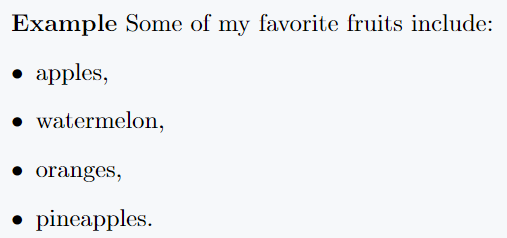
\textbf{Example} Some of my favorite fruits include:
\begin{itemize}
\item apples,
\item watermelon,
\item oranges,
\item pineapples.
\end{itemize}
\end{document}Output :
An \item command prints an item on a new line/paragraph, and two items are separated by a predefined vertical gap.
There is no need of using line breaks in all the listing environments because they only increase and give us unnecessary space.
By default, \item command introduces a new line/paragraph as earlier mentioned.
List levels(First to Fourth)
Itemize environment can be nested up to 4 times within the environment with 4 different lavels.
The default levels for the different levels when nesting include:
| Level | Definition and Representation |
|---|---|
| First Level | \textbullet → ● |
| Second Level | \normalfont \bfseries \textendash → – |
| Third Level | \textasteriskcentered → ﹡ |
| Fourth Level | \textperiodcentered → · |
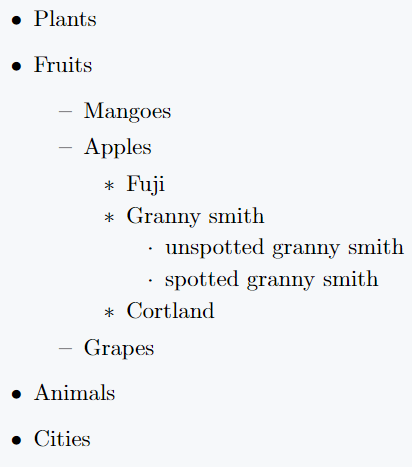
Example to demonstrate the default labeling when nesting is performed in itemize environment is shown below:
\documentclass{article}
\begin{document}
  \begin{itemize}
	\item Plants
	\item Fruits
	\begin{itemize}
	      \item Mangoes
	      \item Apples
	      \begin{itemize}
		    \item Fuji
		    \item Granny smith
		    \begin{itemize}
		          \item unspotted granny smith
			  \item spotted granny smith
		    \end{itemize}
		    \item Cortland
	       \end{itemize}
	       \item  Grapes
	  \end{itemize}
	  \item Animals
	  \item Cities
  \end{itemize}
\end{document}
Output :
The labels in itemize environment can be customized to our own choice labels by making use of (redefining) the following commands respectively for the first, second, third, and fourth levels:
| Level | Command |
|---|---|
| First Level | \labelitemi |
| Second Level | \labelitemii |
| Third Level | \labelitemiii |
| Fourth Level | \labelitemiv |
By default, the following are already defined in LaTeX
\renewcommand{\labelitemi}{\textbullet}\renewcommand{\labelitemii}{\normalfont\bfseries\textendash}\renewcommand{\labelitemiii}{\textasteriskcentered}\renewcommand{\labelitemiv}{\textperiodcentered}
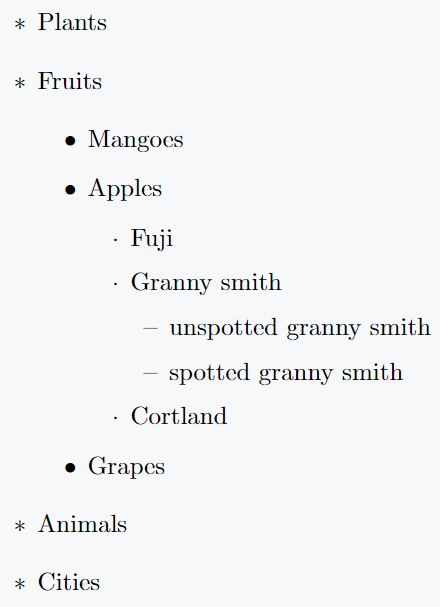
You can modify the labels and have a different order by simply interchanging the values of the commands for example.
If I want the order of my labels to be an asterisk, bullet, period, and a dash, then I will define the commands as follows
\renewcommand{\labelitemi}{\textasteriskcentered}\renewcommand{\labelitemii}{\textbullet}\renewcommand{\labelitemiii}{\textperiodcentered}\renewcommand{\labelitemiv}{\normalfont\bfseries\textendash}
\documentclass{article}
\renewcommand{\labelitemi}{\textasteriskcentered}
\renewcommand{\labelitemii}{\textbullet}
\renewcommand{\labelitemiii}{\textperiodcentered}
\renewcommand{\labelitemiv}{\normalfont\bfseries\textendash}
\begin{document}
    \begin{itemize}
	\item Plants
	\item Fruits
	\begin{itemize}
	    \item Mangoes
	    \item Apples
	    \begin{itemize}
		\item Fuji
		\item Granny smith
		\begin{itemize}
		    \item unspotted granny smith
		    \item spotted granny smith
		\end{itemize}
		\item Cortland
	    \end{itemize}
	    \item  Grapes
	\end{itemize}
	\item Animals
	\item Cities
    \end{itemize}
\end{document}
Output :
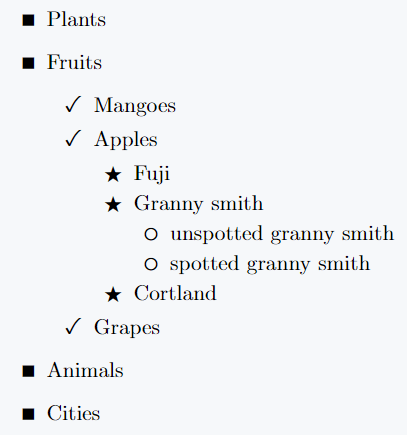
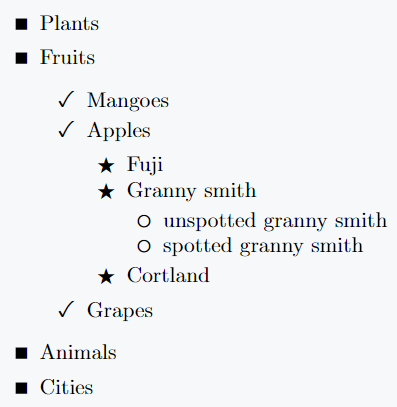
Replace default level symbols with other symbols
You can define different types of labels for the first, second, third, and fourth levels of your list.
\documentclass{article}
\usepackage{fdsymbol}
\renewcommand{\labelitemi}{$ \medblacksquare $}
\renewcommand{\labelitemii}{$ \checkmark $}
\renewcommand{\labelitemiii}{$ \medblackstar $}
\renewcommand{\labelitemiv}{$ \mdlgwhtcircle $}
\begin{document}
    \begin{itemize}
	\item Plants
	\item Fruits
	\begin{itemize}
	    \item Mangoes
	    \item Apples
	    \begin{itemize}
		\item Fuji
		\item Granny smith
		\begin{itemize}
		    \item unspotted granny smith
		    \item spotted granny smith
		\end{itemize}
		\item Cortland
	    \end{itemize}
	    \item  Grapes
	\end{itemize}
	\item Animals
	\item Cities
    \end{itemize}
\end{document}
Output :
List spacing in LaTeX
LATEX provides us a means to regulate the vertical spacing within the different items in our list.
The spacing can be controlled locally within the list environment or globally from the preamble.
The command responsible for that is itemsep command.
To remove the vertical spacing between items in a list, we set it as follows \setlength{\itemsep}{0em}. To add a vertical spacing of 2em, we set it as follows \setlength{\itemsep}{2em}.
Remember, in order not to add under every itemize environment, it is sufficient to place it in your preamble and the spacing will be addressed globally.
\documentclass{article}
\usepackage{fdsymbol}
\renewcommand{\labelitemi}{$ \medblacksquare $}
\renewcommand{\labelitemii}{$ \checkmark $}
\renewcommand{\labelitemiii}{$ \medblackstar $}
\renewcommand{\labelitemiv}{$ \mdlgwhtcircle $}
\begin{document}
    \begin{itemize}
        \setlength{\itemsep}{0em}
	\item Plants
	\item Fruits
	\begin{itemize}
            \setlength{\itemsep}{0em}
	    \item Mangoes
	    \item Apples
	    \begin{itemize}
                \setlength{\itemsep}{0em}
		\item Fuji
		\item Granny smith
		\begin{itemize}
                    \setlength{\itemsep}{0em}
		    \item unspotted granny smith
		    \item spotted granny smith
		\end{itemize}
		\item Cortland
	    \end{itemize}
	    \item  Grapes
	\end{itemize}
	\item Animals
	\item Cities
    \end{itemize}
\end{document}
Output :
Enumerate environment(numbered list)
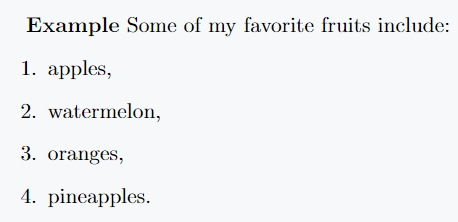
The enumerate environment is used to produce numbered list. The default marking or label of an item in the itemize environment is an Arabic numeral i.e 1,2,3 . . . .
\documentclass{article}
\begin{document}
  \textbf{Example}  Some of my favorite fruits include:
  \begin{enumerate}
	\item  apples,
	\item  watermelon,
	\item  oranges,
	\item  pineapples.
  \end{enumerate}
\end{document}
Output :
As earlier mentioned, the \item command prints an item on a new line/paragraph, and two items are separated by a predefined vertical gap. There is no need of using line breaks.
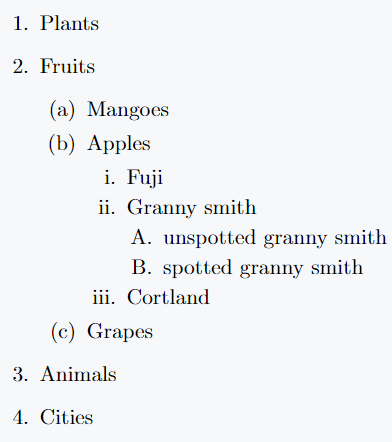
Enumerate environment can be nested up to 4 times within the environment with 4 different labels. Default labels for the different levels when nesting include:
| Level | Definition and Representation |
|---|---|
| First Level | \arabic{enumi} → 1., 2., 3. |
| Second Level | \alph{enumii} → (a), (b), (c) |
| Third Level | \roman{enumiii} → i., ii., iii. |
| Fourth Level | \Alph{enumiv} → A., B., C. |
An example to demonstrate the default labeling(numbering style) when nesting is performed in enumerate environment is shown below:
\documentclass{article}
\begin{document}
   \begin{enumerate}
   \item Plants
   \item Fruits
   \begin{enumerate}
	   \item Mangoes
	   \item Apples
	   \begin{enumerate}
		   \item Fuji
		   \item Granny smith
		   \begin{enumerate}
			   \item unspotted granny smith
			   \item spotted granny smith
		   \end{enumerate}
		   \item Cortland
	   \end{enumerate}
	   \item  Grapes
   \end{enumerate}
   \item Animals
   \item Cities
   \end{enumerate}
\end{document}
Output :
The labels in the enumerate environment can be customized to our own choice labels by making use of (redefining) the following commands respectively for the first, second, third, and fourth levels:
| Level | Command |
|---|---|
| First Level | \labelenumi |
| Second Level | \labelenumii |
| Third Level | \labelenumiii |
| Fourth Level | \labelitemiv |
By default, the following are already defined in LaTeX
\renewcommand{\labelenumi}{\arabic{enumi}.}\renewcommand{\labelenumii}{(\alph{enumii})}\renewcommand{\labelenumiii}{\roman{enumiii}.}\renewcommand{\labelenumiv}{\Alph{enumiv}.}
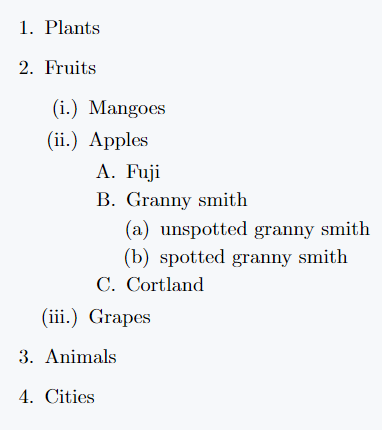
You can modify the labels and have a different order by simply interchanging the values of the commands for example.
If I want the order of my labels to be Arabic numerals, roman numerals, capital alphabetic letters, and small alphabetic letters, then you will define the commands as follows
\renewcommand{\labelenumi}{\arabic{enumi}.}\renewcommand{\labelenumii}{(\roman{enumiii}.)}\renewcommand{\labelenumiii}{\Alph{enumiii}.}\renewcommand{\labelenumiv}{ (\alph{enumiv})}
\documentclass{article}
\renewcommand{\labelenumi}{\arabic{enumi}.}
\renewcommand{\labelenumii}{(\roman{enumii}.)}
\renewcommand{\labelenumiii}{\Alph{enumiii}.}
\renewcommand{\labelenumiv}{ (\alph{enumiv})}
\begin{document}
   \begin{enumerate}
   \item Plants
   \item Fruits
   \begin{enumerate}
	   \item Mangoes
	   \item Apples
	   \begin{enumerate}
		   \item Fuji
		   \item Granny smith
		   \begin{enumerate}
			   \item unspotted granny smith
			   \item spotted granny smith
		   \end{enumerate}
		   \item Cortland
	   \end{enumerate}
	   \item  Grapes
   \end{enumerate}
   \item Animals
   \item Cities
   \end{enumerate}
\end{document}
Output :
Another aspect peculiar only to the enumerate environment is that LATEX gives you a possibility of referencing the different items listed by this environment.
Similarly, their default referring styles can be altered by redefining the commands \theenumi, \theenumii, \theenumiii, and \theenumiv, respectively. In summary
| Level | Command |
|---|---|
| First Level | \theenumi |
| Second Level | \theenumi |
| Third Level | \theenumiii |
| Fourth Level | \theenumiv |
\documentclass{article}
\renewcommand{\labelenumi}{\arabic{enumi}.}
\renewcommand{\labelenumii}{(\roman{enumiii}.)}
\renewcommand{\labelenumiii}{\Alph{enumiii}.}
\renewcommand{\labelenumiv}{ (\alph{enumiv})}
\renewcommand{\theenumi}{(\arabic{enumi})}
\renewcommand{\theenumii}{(\Alph{enumii})}
\renewcommand{\theenumiii}{(\alph{enumiii})}
\renewcommand{\theenumiv}{(\roman{enumiv})}
\begin{document}
   \begin{enumerate}
   \item Plants  \label{item:Pla}
   \item Fruits
   \begin{enumerate}
	   \item Mangoes  \label{item:Man}
	   \item Apples
	   \begin{enumerate}
		   \item Fuji
		   \item Granny smith  \label{item:Gra}
		   \begin{enumerate}
			\item unspotted granny smith
			\item spotted granny smith
                        \label{item:sgran}
		   \end{enumerate}
		   \item Cortland
	   \end{enumerate}
	   \item  Grapes
   \end{enumerate}
   \item Animals
   \item Cities
   \end{enumerate}
\end{document}
Output :

Description environment
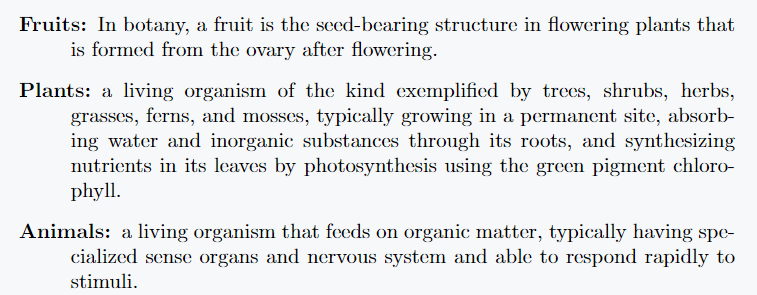
The description environment gives us the possibility to define terms or give descriptions of terms as the name says. For example
\documentclass{article}
\begin{document}
  \begin{description}
     \item[Fruits:]  In botany, a fruit is the seed-bearing structure in flowering plants that is formed from the ovary after flowering.
     \item[Plants:] a living organism of the kind exemplified by trees, shrubs, herbs, grasses, ferns, and mosses, typically growing in a permanent site, absorbing water and inorganic substances through its roots, and synthesizing nutrients in its leaves by photosynthesis using the green pigment chlorophyll.
     \item[Animals:] a living organism that feeds on organic matter, typically having specialized sense organs and nervous system and able to respond rapidly to stimuli.
  \end{description}
\end{document}
Output :
Just like the itemize, the description environment does not have a counter and it’s items can not be referred(referenced).
And as we have seen every item in the description environment takes an optional argument which appears in bold after the code compiles.
Optional arguments can just be anything from letters, and numbers to even sentences, rules, or an action.
Font style of labeling can be changed by redefining the \descriptionlabel command.
Note that the default is text boldface. We can the labels change the formatting by redefining the command as shown below
\renewcommand{\descriptionlabel}[1]{\textsl{#1}},
\renewcommand{\descriptionlabel}[1]{\texttt{#1}},
\renewcommand{\descriptionlabel}[1]{\textit{#1}}
Command will print the labels in slanted shape, typewriter, and italicize respectively. You can use any font type medium, italic, typewriter, boldface, and many other text formattings.
The effect will be global if redefined in the preamble, otherwise local only to the following description environments if redefined inside the document environment.
For example, Let’s redefine the labels to be typewriter font type.
\documentclass{article}
\begin{document}
  \renewcommand{\descriptionlabel}[1]{\texttt{#1}}
    \begin{description}
      \item[Fruits:]  In botany, a fruit is the seed-bearing structure in flowering plants that is formed from the ovary after flowering.
      \item[Plants:] a living organism of the kind exemplified by trees, shrubs, herbs, grasses, ferns, and mosses, typically growing in a permanent site, absorbing water and inorganic substances through its roots, and synthesizing nutrients in its leaves by photosynthesis using the green pigment chlorophyll.
      \item[Animals:] a living organism that feeds on organic matter, typically having specialized sense organs and nervous system and able to respond rapidly to stimuli.
    \end{description}
\end{document}
Output :

Nested 3 Listing Environments
LaTeX gives provision for nesting within the 3 environments. For example
\documentclass{article}
\begin{document}
	\begin{enumerate}
	\item Plants
	\item Fruits
	\begin{itemize}
		\item Mangoes
		\item Apples
		\begin{description}
			\item[(i)] Fuji
			\item[(ii)] Granny smith
			\item[(iii)] Cortland
		\end{description}
		\item  Grapes
	\end{itemize}
	\item Animals
	\item Cities
	\end{enumerate}
\end{document}
Output :
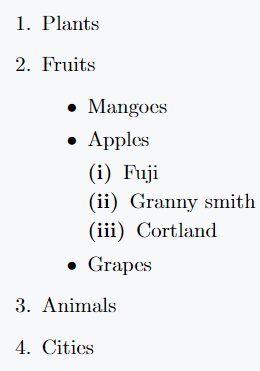
Note that the \item[label] command takes as an optional argument, any given label. That is to say you can manually put your labels in the square bracket to display them across the 3 environments.
The automatic numbering continues wherever the optional label is not inserted. There are two examples below to illustrate this
\documentclass{article}
\begin{document}
    First example with manually defined labels
    \begin{enumerate}
		\item[(a)] Plants
		\item[(b)] Fruits
		\item[(c)] Animals
		\item[(d)] Cities
	\end{enumerate}
	Second example showing two manually define label and the other two automatically displayed
	\begin{enumerate}
		\item[(a)] Plants
		\item[(b)] Fruits
		\item Animals
		\item  Cities
	\end{enumerate}
	Same as the example above but in the itemize environment to demonstrate the possibility.
	\begin{itemize}
	        \item[(a)] Plants
	        \item[(b)] Fruits
	        \item Animals
	        \item  Cities
	\end{itemize}
\end{document}
Output :
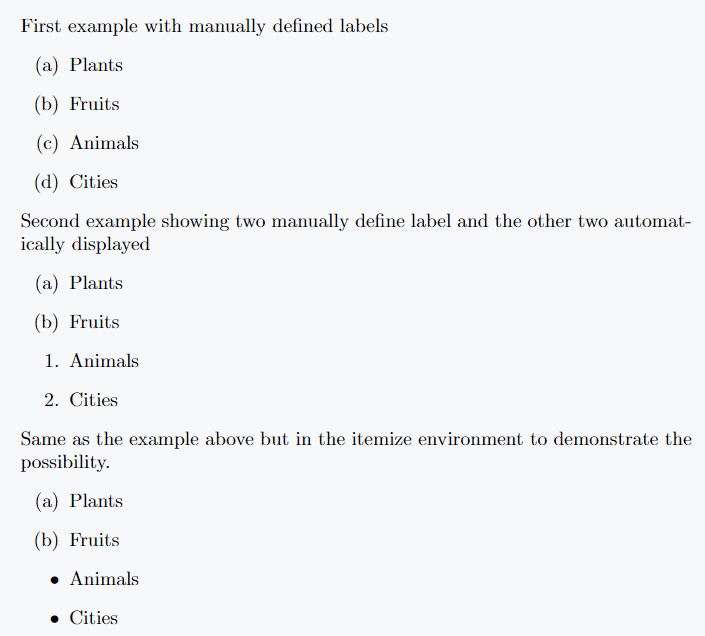
It is obviously the same thing with the description environment since you have to define all the optional arguments taken the different items.
Lastly,
The enumerate environment permit us to define a listing pattern in an option argument. This is a provision of the enumerate package. The syntax is as shown below
\begin{enumerate}[list_definition]
content...
\end{enumerate}
For example
\documentclass{article}
\usepackage{enumerate}
\begin{document}
	For arabic numbers
	\begin{enumerate}[{\textbf{Question}} 1 ]
		\item Define the following terms \dots
		\item What do you understand by \dots
		\item Evaluate the following\dots
	\end{enumerate}
	For capital alphabetic letters
	\begin{enumerate}[{\textbf{Question}} A ]
		\item Define the following terms \dots
		\item What do you understand by \dots
		\item Evaluate the following\dots
	\end{enumerate}
	For small alphabetic letters
	\begin{enumerate}[{\textbf{Question}} a ]
		\item Define the following terms \dots
		\item What do you understand by \dots
		\item Evaluate the following\dots
	\end{enumerate}
	For small alphabetic letters
	\begin{enumerate}[{\textbf{Question}} i]
		\item Define the following terms \dots
		\item What do you understand by \dots
		\item Evaluate the following\dots
	\end{enumerate}
\end{document}
Output :
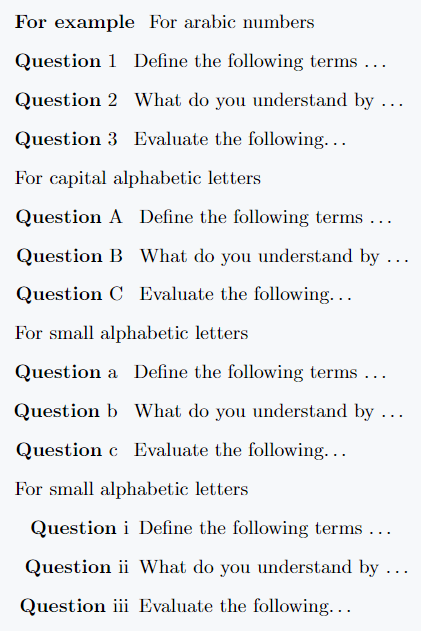
In the same way, you can modify and put just anything Properties, exercises, Notes, remarks, and just anything to automatically gain the numbering you desired.
Remember an initial of any of the numbering types is needed.
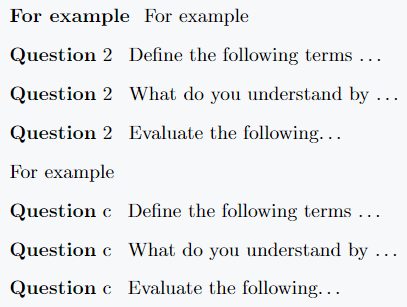
Only 1, a, A, i will automatically display the numbering. Starting with something like 2 or b, B or ii will cause you to have the listing with repetitive numbering for example
\documentclass{article}
\usepackage{enumerate}
\begin{document}
    \textbf{For example }
	For example
	\begin{enumerate}[{\textbf{Question}} 2 ]
		\item Define the following terms \dots
		\item What do you understand by \dots
		\item Evaluate the following\dots
	\end{enumerate}
	For example
	\begin{enumerate}[{\textbf{Question}} c ]
		\item Define the following terms \dots
		\item What do you understand by \dots
		\item Evaluate the following\dots
	\end{enumerate}
\end{document}
Output :
Conclusion
This article gives you full coverage of how to create different types of lists in LaTeX. It is an important concept to understand because it helps us to bring out our ideas in a very order manner.
It’s applications are wide and used broadly in other concepts in LaTeX as we shall be seeing in the near future.
A carefully reading and practice of this tutorial will give you a solid understanding of listing in LaTeX.
Jidan
LaTeX enthusiast and physics educator who enjoys explaining mathematical typesetting and scientific writing in a simple way. Writes tutorials to help students and beginners understand LaTeX more easily.