In documents with wide margins or in two-column layouts, placing captions to the side of figures can make more efficient use of space.
There are multiple ways to achieve side captions in LaTeX. Below, we’ll explore some of the most common methods, providing simple explanations and code examples for each.
Using sidecap package for side caption of figure
Using sidecap package in LaTeX allows for a flexible placement of figure captions to the side of figure. And sidecap package provides an environment called SCfigure for figures with side captions.
This package can be configured to position captions to the left, right or even vertically top, centered or bottom-aligned relative to figure.
Below, we will explore how to use this package for various caption positions.
\usepackage[option]{sidecap}
This options control the positioning of captions relative to figures.
leftcaption: This option forces captions to always be placed on the left side of figure or table, regardless of page.
rightcaption: Similarly, this option forces captions to always be placed on the right side of figure or table.
\sidecaptionvpos{figure}{option}
This command is part of the sidecap package in LaTeX and provides control over the vertical positioning of captions that are placed beside figures.
option: This argument determines the vertical alignment of the caption relative to figure or table. There are typically three options you can choose from: c for center, t for top, and b for bottom alignment.
Right side caption with vertical alignment
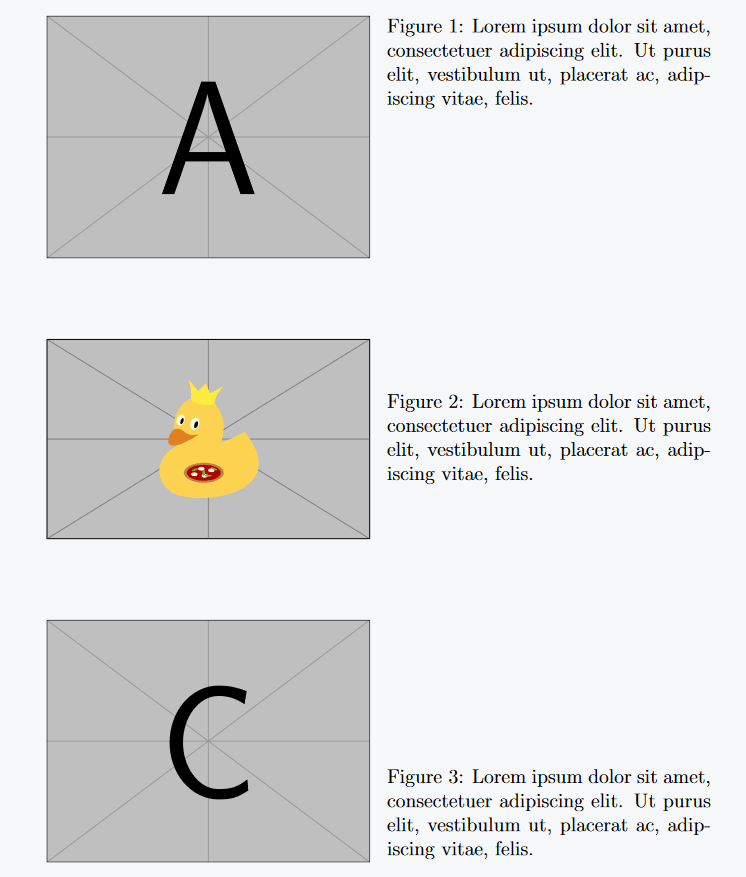
Caption position will be right side whether you use rightcaption or no option with package. And with that, the code below shows implementation of each vertical align, such as top, center, and bottom.
\documentclass[12pt]{article}
\usepackage[rightcaption]{sidecap}
\usepackage{graphicx}

\begin{document}

{
\sidecaptionvpos{figure}{t}
\begin{SCfigure}
  \includegraphics[width=0.5\textwidth]{example-image-a}
  \caption{ Lorem ipsum dolor sit amet, consectetuer
adipiscing elit. Ut purus elit, vestibulum ut, placerat
ac, adipiscing vitae, felis.}
  \label{fig:img1}
\end{SCfigure}
}

{
\sidecaptionvpos{figure}{c}
\begin{SCfigure}
  \includegraphics[width=0.5\textwidth]{example-image-duck}
  \caption{ Lorem ipsum dolor sit amet, consectetuer
adipiscing elit. Ut purus elit, vestibulum ut, placerat
ac, adipiscing vitae, felis.}
  \label{fig:img2}
\end{SCfigure}
}

{
\sidecaptionvpos{figure}{b}
\begin{SCfigure}
  \includegraphics[width=0.5\textwidth]{example-image-c}
  \caption{ Lorem ipsum dolor sit amet, consectetuer
adipiscing elit. Ut purus elit, vestibulum ut, placerat
ac, adipiscing vitae, felis.}
  \label{fig:img3}
\end{SCfigure}
}

\end{document}
Output :
Left side caption with vertical alignment
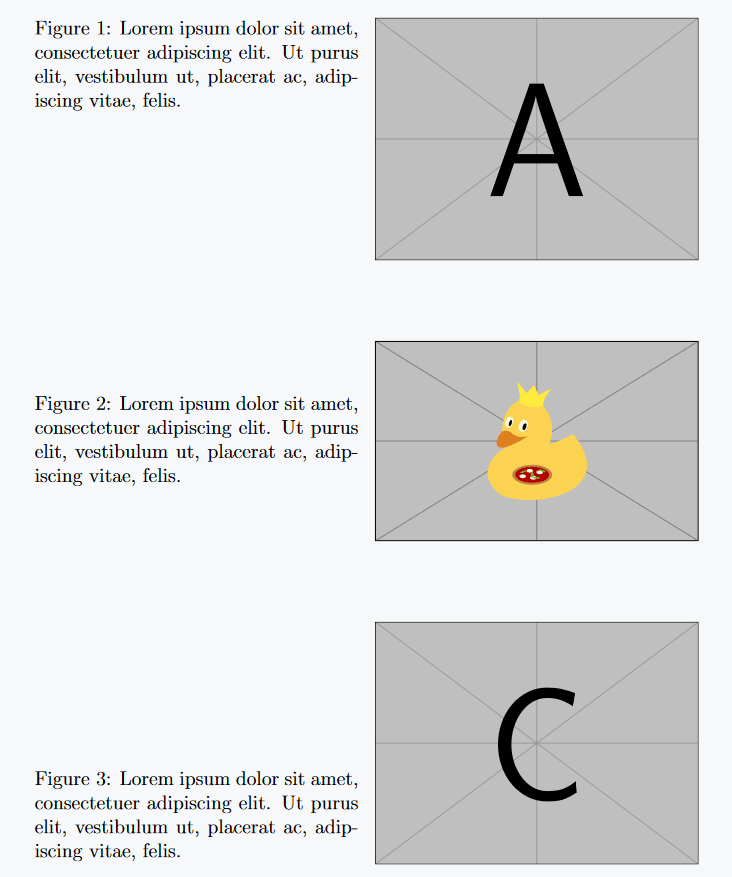
By simply changing rightcaption to leftcaption in \usepackage command, the caption moves to left of figure. And rest of code remains same, maintaining the vertical alignment.
\documentclass[12pt]{article}
\usepackage[leftcaption]{sidecap}
\usepackage{graphicx,lipsum}

\begin{document}

{
\sidecaptionvpos{figure}{t}
\begin{SCfigure}
\caption{ Lorem ipsum dolor sit amet, consectetuer
adipiscing elit. Ut purus elit, vestibulum ut, placerat
ac, adipiscing vitae, felis.}
  \includegraphics[width=0.5\textwidth]{example-image-a}
  \label{fig:img1}
\end{SCfigure}
}

{
\sidecaptionvpos{figure}{c}
\begin{SCfigure}
  \includegraphics[width=0.5\textwidth]{example-image-duck}
  \caption{ Lorem ipsum dolor sit amet, consectetuer
adipiscing elit. Ut purus elit, vestibulum ut, placerat
ac, adipiscing vitae, felis.}
  \label{fig:img2}
\end{SCfigure}
}

{
\begin{SCfigure}
  \includegraphics[width=0.5\textwidth]{example-image-c}
  \caption{ Lorem ipsum dolor sit amet, consectetuer
adipiscing elit. Ut purus elit, vestibulum ut, placerat
ac, adipiscing vitae, felis.}
  \label{fig:img3}
\end{SCfigure}
}

\end{document}
Output :
Manually with minipage
For more control over the placement and appearance of side captions, you can use the minipage environment.
The basic syntax for using minipage to create a side caption for a figure looks like this:
% For right caption

\begin{figure}
  \begin{minipage}{width1}
    \includegraphics[width=\linewidth]{image-path}
  \end{minipage}
  \hfill % Optional space between figure and caption
  \begin{minipage}{width2}
    \caption{Your caption here}
  \end{minipage}
\end{figure}

% For left caption

\begin{figure}
  \begin{minipage}{width1}
    \caption{Your caption here}
  \end{minipage}
  \hfill % Optional space between figure and caption
  \begin{minipage}{width2}
    \includegraphics[width=\linewidth]{image-path}
  \end{minipage}
\end{figure}
Right side with vertical alignment
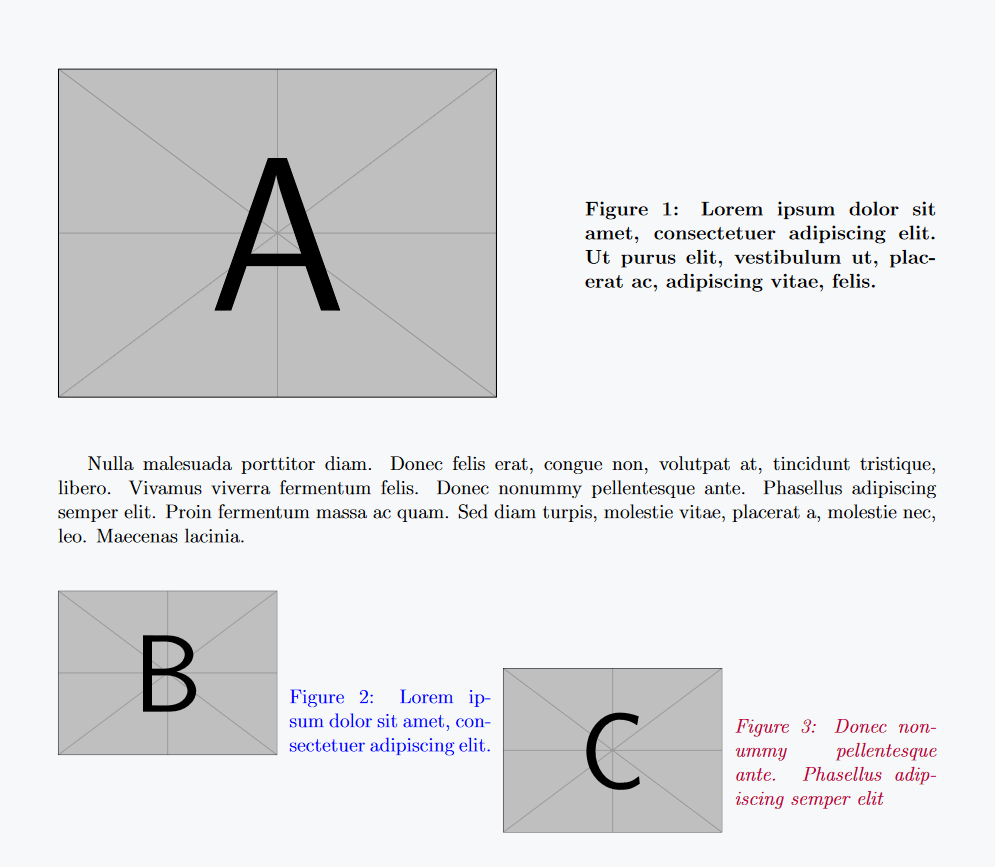
This code example uses two minipage environments with widths set to half of text width each. The figure is placed in left minipage, and the caption in right, achieving a right-side caption with vertical alignment.
\documentclass[12pt]{article}
\usepackage[left=1.5cm,right=1.5cm]{geometry}
\usepackage{graphicx,lipsum,xcolor} % For images

\begin{document}

\begin{figure}[htb]
  \begin{minipage}[c]{.5\textwidth}
    \includegraphics[width=\linewidth]{example-image-a}
  \end{minipage}
  \hfill
  \begin{minipage}[c]{0.4\textwidth}
    \textbf{\caption{Lorem ipsum dolor sit amet, consectetuer
adipiscing elit. Ut purus elit, vestibulum ut, placerat
ac, adipiscing vitae, felis.}}
    \label{fig:image1}
  \end{minipage}
\end{figure}

\vspace{15px}
\lipsum[3][1-8]
\vspace{15px}

\begin{figure}[htb]
  \begin{minipage}[b]{0.25\textwidth}
    \includegraphics[width=\linewidth]{example-image-b}
  \end{minipage} \hfill
  \begin{minipage}[b]{0.23\textwidth}
    \textcolor{blue}{\caption{Lorem ipsum dolor sit amet, consectetuer
adipiscing elit.}}
    \label{fig:image2}
  \end{minipage} \hfill
    \begin{minipage}[c]{0.25\textwidth}
    \includegraphics[width=\linewidth]{example-image-c}
  \end{minipage} \hfill
  \begin{minipage}[c]{0.23\textwidth}
 \textcolor{purple}{\textit{\caption{Donec nonummy pellentesque ante. Phasellus adipiscing semper elit}}}
    \label{fig:image3}
  \end{minipage}
\end{figure}

\end{document}
Output :
Left side with vertical alignment
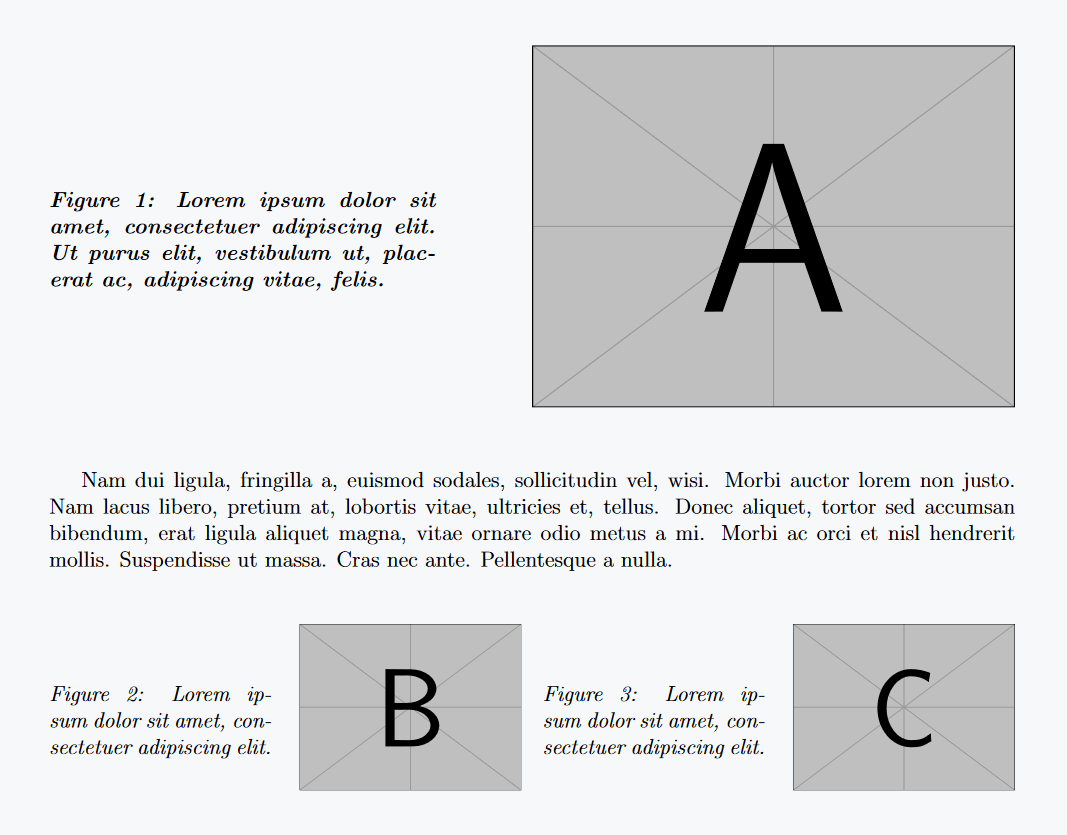
To place caption on the left side, and order of minipage environments is reversed.
\documentclass[12pt]{article}
\usepackage{graphicx,lipsum}

\begin{document}

\begin{figure}[htb]
  \begin{minipage}[c]{0.4\textwidth}
    \textit{\textbf{\caption{Lorem ipsum dolor sit amet, consectetuer
adipiscing elit. Ut purus elit, vestibulum ut, placerat
ac, adipiscing vitae, felis.}}}
    \label{fig:image1}
  \end{minipage}
    \hfill
  \begin{minipage}[c]{0.5\textwidth}
    \includegraphics[width=\linewidth]{example-image-a}
  \end{minipage}
\end{figure}
\vspace{15px}
\lipsum[2][1-8]
\vspace{15px}
\begin{figure}[htb]
  \begin{minipage}[c]{0.23\textwidth}
    \textit{\caption{Lorem ipsum dolor sit amet, consectetuer
adipiscing elit.}}
    \label{fig:image2}
  \end{minipage} \hfill
  \begin{minipage}[c]{0.23\textwidth}
    \includegraphics[width=\linewidth]{example-image-b}
  \end{minipage}\hfill
  \begin{minipage}[c]{0.23\textwidth}
    \textit{\caption{Lorem ipsum dolor sit amet, consectetuer
adipiscing elit.}}
    \label{fig:image3}
  \end{minipage} \hfill
  \begin{minipage}[c]{0.23\textwidth}
    \includegraphics[width=\linewidth]{example-image-c}
  \end{minipage}
\end{figure}

\end{document}
Output :
Conclusion
Both sidecap package and minipage environment methods provide efficient ways to add side captions to figures in LaTeX documents. The choice between them depends on your specific requirements and desired level of control over the layout.
Each method offers a solution for both right and left side captions, with vertical alignment.


