Diagonal lines in table cells are often needed when creating complex headers in LaTeX.
In this tutorial you will learn everything step by step, from basic usage to styling, spacing, and best practices.
Basic usage of diagbox
The most common way to create a diagonal split is with \diagbox.
It can accept two arguments or three arguments. Two arguments create a single diagonal split, and three arguments create a double diagonal split.
\diagbox{Left}{Top}
\diagbox{Left}{Middle}{Right}
-
LeftContent that appears in the bottom-left or left part of the diagonal box. It is often used for row labels.
-
TopContent that appears in the top-right or upper part of the box. It usually represents column labels.
-
MiddleWhen given, it divides the box into three parts using two diagonal lines. This is helpful for complex headers.
\documentclass{article}
\usepackage{diagbox}
\begin{document}
\begin{tabular}{|c|c|c|}
\hline
\diagbox{Fruit}{City} & Paris & London \\
\hline
Apple & 12 & 15 \\
\hline
Mango & 20 & 10 \\
\hline
Orange & 15 & 23 \\
\hline
\end{tabular}
\end{document}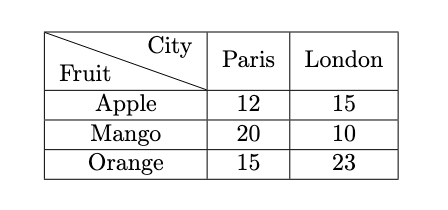
Controlling dimensions
Sometimes automatic size calculation is not enough. You can set fixed width and height for the diagonal box.
There are also options to control spacing inside and outside the box.
\diagbox[width=4cm, height=3\line]{Row}{Col}
\diagbox[innerwidth=2cm]{Row}{Col}
\diagbox[outerrightsep=-10pt]{Row}{Col}
-
widthDefines the total width of the diagonal box. Useful when one column is too narrow and the line does not fit properly.
-
heightDefines the total height of the diagonal box. The unit
\linecan be used to refer to line height. -
innerwidthControls the width of the inner content. Helps when aligning with fixed column widths like
p{2cm}. -
outerleftsepandouterrightsepControl the space between the diagonal box and the tabular cell border. Often negative values are used to make the diagonal line connect smoothly with vertical lines.
\documentclass{article}
\usepackage{diagbox}
\begin{document}
\begin{tabular}{|p{4cm}|c|}
\hline
\diagbox[width=4cm,height=2\line]{Fruit}{Price} & Value \\
\hline
Orange & 5 \\
\hline
Banana & 8 \\
\hline
\end{tabular}
\end{document}
Changing diagonal direction
The default diagonal goes from top-left to bottom-right. But you can change the direction using the dir option.
\diagbox[dir=NE]{A}{B}
\diagbox[dir=SW]{A}{B}
\diagbox[dir=SE]{A}{B}
-
dir=NWThis is the default. The line goes from top-left to bottom-right.
-
dir=NEThe line goes from bottom-left to top-right. It is useful when text needs to be swapped.
-
dir=SWThe line goes from top-right to bottom-left. Equivalent to NE in a single diagonal case.
-
dir=SEThe line goes from top-left to bottom-right, equivalent to NW in single diagonal case.
\documentclass{article}
\usepackage{diagbox}
\begin{document}
\begin{tabular}{|c|c|}
\hline
\diagbox[dir=NE]{Animal}{Color} & Result \\
\hline
Dog & Brown \\
\hline
Cat & White \\
\hline
\end{tabular}
\end{document}
Add spacing
Sometimes text alignment problems appear. The diagbox package gives more control with left and right spacing.
\diagbox[leftsep=0.5cm,rightsep=0pt]{Row}{Col}
\diagbox[trim=l]{Row}{Col}
\diagbox[trim=r]{Row}{Col}
-
leftsepandrightsepShortcut keys to set both inner and outer spacing at the same time. Adjusts how text sits inside the diagonal cell.
-
trimRemoves extra margins from the left or right side. Values can be
l,r, orlr. Helpful when using@{}column specifiers.
\documentclass{article}
\usepackage{diagbox}
\begin{document}
\begin{tabular}{|c|c|}
\hline
\diagbox[trim=l]{City}{Food} & Item \\
\hline
Rome & Pasta \\
\hline
Tokyo & Sushi \\
\hline
\end{tabular}
\end{document}
Font, color, and line thickness
The diagbox command allows you to change font, line thickness, and color. This makes tables more readable and stylish.
\diagbox[font=\itshape]{Italic}{Label}
\diagbox[linewidth=2pt]{Row}{Col}
\diagbox[linecolor=red]{Row}{Col}
-
fontChanges the font style for text inside the diagonal cell. Any LaTeX font switch can be used.
-
linewidthSets how thick the diagonal line should be. Use
ptunits for control. -
linecolorChanges the color of the diagonal line. Requires loading
colororxcolorpackage.
\documentclass{article}
\usepackage{diagbox}
\usepackage{xcolor}
\begin{document}
\begin{tabular}{|c|c|}
\hline
\diagbox[linewidth=1pt,linecolor=blue,font=\bfseries]{Sport}{Season} & Value \\
\hline
Football & Winter \\
\hline
Cricket & Summer \\
\hline
\end{tabular}
\end{document}
Multi-line and manual adjustments
If your labels are too long, you can break them into multiple lines using \\.
Sometimes you must set height manually for proper fit.
\diagbox[height=3\line]{Row\\Label}{Col\\Label}
-
\\Allows breaking labels into two or more lines inside the diagonal cell. Useful for long words or structured headers.
-
heightDefines the vertical size of the cell so that all lines fit neatly. Without this, overlapping may occur.
\documentclass{article}
\usepackage{diagbox}
\begin{document}
\begin{tabular}{|c|}
\hline
\diagbox[height=3\line]{Fruit\\Name}{Country\\Origin} \\
\hline
\end{tabular}
\end{document}
Use slashbox command
The diagbox package also provides \slashbox and \backslashbox commands. These are only for old documents.
In reality, they are implemented inside diagbox, so results may look slightly different.
It is better to use \diagbox directly in new documents.
\documentclass{article}
\usepackage{diagbox}
\begin{document}
\begin{tabular}{|c|c|c|}
\hline
\slashbox{Country}{Food} & A & B \\
\hline
Italy & Pizza & Pasta \\
\hline
Japan & Sushi & Ramen \\
\hline
\end{tabular}
\end{document}